Showing posts with label craft tutorial. Show all posts

Sunday, January 1, 2012

Felt Bird Decorations!


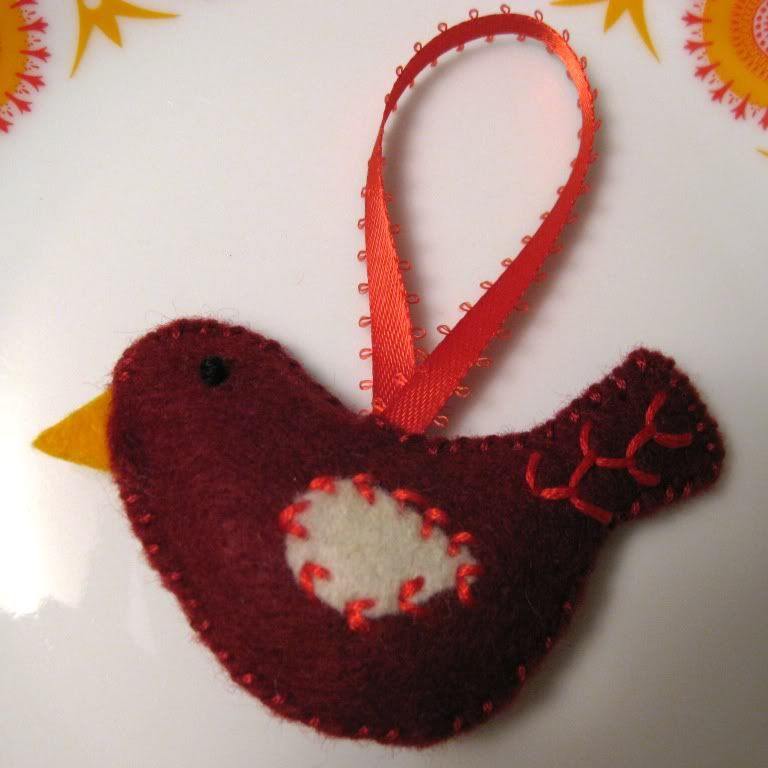
Happy New Year everyone! I made these felt birds as tree decorations, but they could be used for a bird mobile or kooky present adornments.

How To:

1. I used Becca's DIY fabric bird template with a few alterations. I only used the body and wing pieces (not the belly piece).  I also snipped off the beak from both pieces of the body and added a yellow felt beak.
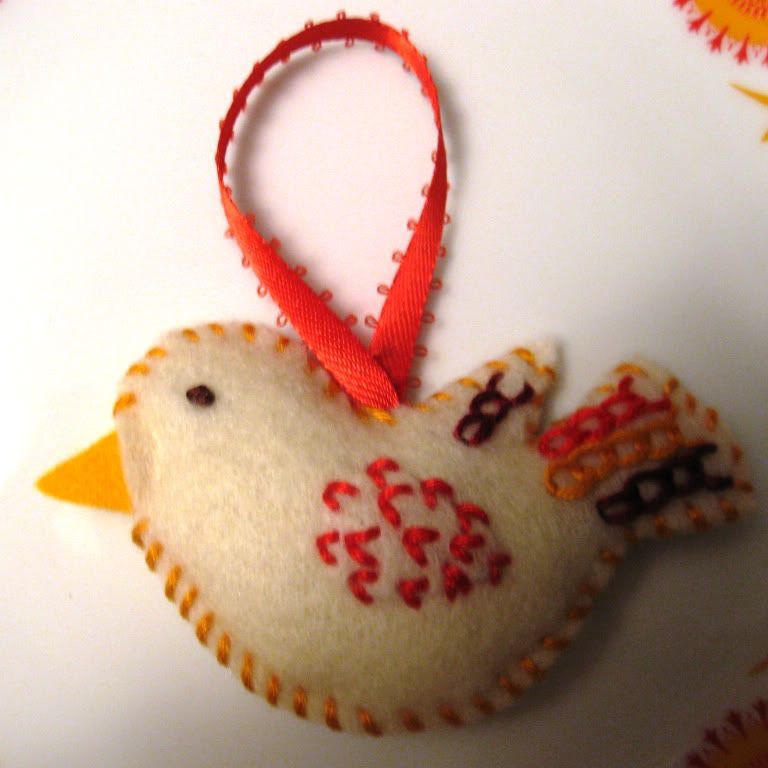

2. After cutting out two body pieces and two wing pieces, I embroidered the tail and wings with colourful embroidery floss. I had never embroidered before, but I found it quite easy to learn by googling "embroidery stitches" and following the diagrams that pop up. For the white, yellow and red bird, and for the dark red bird, I used a v-shaped stitch (I improvised, and I don't know the correct terminology for this stitch) to embroider the wings and to attach the wings to each body piece. I used a chain stitch for the white, yellow and red bird's tail, a feather stitch for the dark red bird's tail, and a feather stitch combined with french knot stitches for the tail of the white, green and blue bird. To make the eyes, I used a french knot stitch.


3. To make the beak, I cut out two triangles from yellow felt and glued them together to make a thicker felt beak. After decorating each of the two body pieces with different embroidery designs, I glued the edge of the felt beak to the wrong side of one of the body pieces - A. I then lined up the other body piece - B - (so that the wrong sides faced each other, with the beak in the middle) and glued the edge of the beak to body piece B.

4. After the glue dried, I used a whip stitch to stitch the body pieces together. Starting at the base of the beak, I made my way around the edge of the body until the base of the tail. I stuffed the bird with pieces of white acrylic yarn (much cheaper than polyester stuffing!) and continued stitching until the middle of the bird's back. At this point, I inserted a looped piece of ribbon between the two body pieces and stitched through it to attach it. I continued the whip stitch until the top of the beak, stuffing more white yarn as I went.

 
Variations:
For the white, yellow and red birdie, I added an extra "wing" to the body pieces, right above the tail. For the white, green and blue bird, I cut out two extra wing pieces out of green felt and glued one to each of the body pieces (wrong sides). When it came to whip stitching around the edge, I stitched the extra wing with a different colour floss. For the white, green and blue bird, I also cut out extra large wings and glued them to each body piece before embroidering a feather and v stitch in the middle of each wing.

Thursday, September 1, 2011

Halloween Decorations: How to Make Creepy Specimen Jars

Don't let my flowery header deceive you - I live for Halloween. There's something about scaring the bejeezus out of little trick-or-treaters and sullen teenagers that fills me with joy. When I was a little kid, I loved visiting the houses decorated roof to driveway for Halloween, so I hope today's young'uns are just as grateful for a good fright as I was. Whether you're decorating your porch for Halloween night, or your home for a party, read on for tried and tested decorating tips and ideas. Check back in the coming weeks for more articles!

Specimen Jars
Specimen jars are easy to make, inexpensive, versatile and pack quite the visual punch. They are essentially jars filled with icky things. Make specimen jars for decorating a witch's lair, a mad scientist's lab, a vampire's dungeon, a mummy's crypt, or whatever else you choose as your theme.

Jars
In the weeks prior to your shindig, gather empty pickle, jam, or condiment jars. Make sure you wash them! If the jar lids feature a non-Halloween-appropriate design (e.g. strawberries) use some sandpaper to rough them up. Alternatively, purchase some new containers from your local dollar store. Try to use a variety of shapes and sizes for maximum visual impact. Clear or coloured glass is best, but be careful and keep them out of reach of little children.

Pumpkin-like glass container from the dollar store and 'escaping' spiders.
The Specimens
This is when the fun begins! Think about what scares you or grosses you out and incorporate that into your jars. Here are some ideas:
  • Growing creatures! These glorious inventions can be found at most dollar stores in the toy section. They are tiny things made out of polymers. Read more about how they work here. Growing creatures come in many icky shapes: rats, lizards, bugs, teeth, etc. Add lukewarm water and the creature to one of your jars; over the next few days it will grow in size until it fills the jar. Make multiple - they'll look perfectly gross! Mad scientist. Witch's lair.
Growing octopus specimen jar.
  •  Blood! Buy some fake blood from - you guessed it - the dollar store, or make your own. Here's a nifty video on mixing up fake blood. Unless you're planning on making a large batch for a costume, and therefore need realistic-looking thick blood, you can probably get away with water tinted with red food colouring. If you're placing the jar of blood in a semi-dark room, the translucent water-food colouring mixture will glow in low light and give the best results.Vampire's dungeon.
  • Dollar store knick knacks! Fake bugs, mini skeletons, and hanging ghouls can fill up jars and, in low light, be terribly frightful. Combine the shells from a couple of eggs with some slimy bugs or reptiles to give the look of freshly-hatched other-worldly creatures. Strategically place plastic spiders in the mouth of a jar to give the look of escaping arachnids. Mad scientist. Witch's lair. Vampire's dungeon. Mummy's crypt.
  • Shrunken apple heads! Check out this how-to on creating shrunken apple heads. Place one or two in a tall jar - they'll look like mummified noggins. Or, just use a creepy head from a hanging ghoul decoration, as shown below. I upped the ancient Egyptian vibe by dyeing a strip of cloth with strongly-brewed coffee and wrapping it around the jar's mouth. Mummy's crypt.
Dollar store ghoul + coffee-dyed cloth = Ancient Egyptian mummy head!
Decorating the Jars
For more creepy detail, make some labels for your specimens. Download a few horror-themed fonts from dafont and print up some labels. Be creative and descriptive. For instance, I dubbed my growing creature octopus 'Kraken'.  Next, rip the paper a little to give your labels rough edges. For an aged effect, crumple up the paper to crease it, and dip it in strongly-brewed cool coffee for a dingy brown colour. Or, paint the label red for a blood-soaked look.

Display
Specimen jars look great stacked and clustered together. Make sure you have enough lights around them so the details are visible. I used some old plastic pumpkin lights covered in a gauzy black crinkle cloth for an orange glow.

Specimen jar display.

Happy haunting, and check back for more Halloween how-to's!

Thursday, April 28, 2011

Pushing Daisies and How to Lengthen a Dress

I've recently become obsessed with Pushing Daisies, the quirky show that was canceled before its time. It pretty much combines everything I love: whodunits, baking, colourful dresses, romance, water sports, and a whole lot of funny. I completely covet Chuck's wardrobe of frilly blouses, vintage dresses, colourful coats, and pedal pusher pants.
Chuck seems to love yellow, so when I spotted a yellow sundress (with a daisy-like eyelet pattern, no less) for a rock-bottom price at Winners, I had to scoop it up. It turned out to be a definite fixer-upper. First it had a slit across the middle of the skirt right below the waistline that had been hastily sewn. Fortunately the skirt is quite full so it camouflages my stitching job.
Since it was a bit short for my liking and had a generous hem, I decided to lengthen it. This method only works if the dress/skirt has a hem of at least one inch as most of the extra length comes from the hem.

First, carefully let out the hem using a seam ripper or a pair of scissors. Make sure the bottom edge of your skirt fabric doesn't fray by running a zigzag stitch across the bottom (if the manufacturers haven't done this already).

Next, stitch a length of ribbon to the bottom of the skirt. The ribbon should closely match the colour and weight of the dress. I used a fine polyester ribbon with a width of 1.7 cm. Pin the ribbon to the dress so it just covers the zigzag stitch and sew it down.
Right side:
 Wrong side:
Hem your dress by flipping the ribbon under and pining it. This way, the hem is made up entirely of the ribbon, and all of the original dress material is being used for length.
 Use a blind stitch to sew the hem down. Here's a great video on blind stitching.

Saturday, April 2, 2011

Craft Tutorial: Decoupage Map Box

I decoupaged and painted this box as a Christmas present for my boyfriend. He really liked it and it's held up quite well since December (despite being stacked and filled to capacity)!

Here's how I did it (and you can too):

Materials: a wooden box, a large atlas, mod podge or another type of liquid glue, acrylic paint, liquid acrylic varnish, masking tape, paintbrushes, construction paper, scissors, ruler, pencil, craft knife, screwdriver, sandpaper.

I found the box at a Value Village. It was handmade and a little beat up, but it was a great size and I liked the varnish colour. If you purchase a box from a thrift store, check the inside and avoid boxes that have had varnish seep inside. As you can see from the third photo, there are a few dark marks around the edges that I couldn't paint over properly.

Once I had the box and knew its dimensions, I purchased an atlas from a used bookstore (BMV in Toronto). I looked for one that was in good condition, and had plenty of colourful terrain maps large enough to cover the top of my box.

Directions:
  1. Measure and note the box dimensions. You will need these measurements to cut out your map panels.  
  2. Unscrew the hinge holding the top and bottom of the box together. Try to keep track of which screw went into which hole. I had the unfortunate surprise of finding that the original box craftsman used two different sized screws (and made different sized holes).
  3. Sand the inside of the box with medium to fine grain sandpaper. If you're covering the entire box, also sand the outside. I wanted to let some of the varnished wood peek through, so I skipped sanding the outside.
  4. Once the inside is clean of all wood dust, apply masking tape to the edges of the box that you don't want to paint (in my case, the exposed wood seen in the third picture). If you're going to leave some wood exposed, test a small piece by pressing down the masking tape and removing it. Some of the varnish may come off; in this case, don't press your masking tape down too much. 
  5. Paint the inside with acrylic paint. I chose a turquoise colour to mimic the gorgeous waters of the Caribbean. Paint three coats, waiting a few hours in between each coat. Once the paint has dried thoroughly - about 24 hrs - apply a thin coat of varnish using a clean paintbrush. Your brushstrokes should be going in the same direction. Wait about 6 hours and apply another thin coat of varnish. This time, change of the direction of your brush strokes by 90 degrees. This will create a crosshatch effect and make your brushstrokes less evident. Allow the box to dry 24 hours.
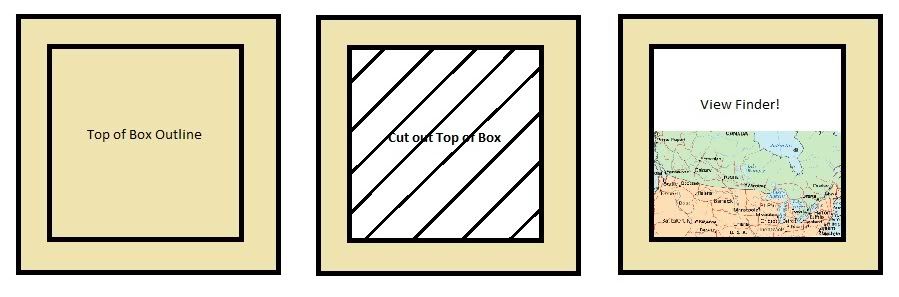
  6. Using the measurements from step 1, create a viewfinder for the top and sides of the box. Draw a rectangle the same size as the top of the box onto construction paper or parchment paper. Cut out the rectangle and discard. Use the remainder as a viewfinder. Repeat with the sides of the box.
  7.  Using the viewfinders, find your preferred map images for the top and sides of the box. I chose a map of northern Canada because I'm a patriotic gal, and maps of the Caribbean, north Africa, southeast Asia and Greece because they're lovely travel destinations. Using a ruler and pencil, lightly trace out the dimensions for the top and sides of the box onto your maps and cut out the panels. 
  8. Cover the exposed wood with masking tape. Paint a thin coat of Mod Podge onto the box and paste your panels. This should be done one panel at a time, allowing for drying time in between. Smooth down any wrinkles immediately. Once the glue has dried, apply a 2 thin coats of Mod Podge onto the panels, allowing for drying time in between. Once the glue has dried 24 hours, apply a thin coat of acrylic varnish and allow it to dry. This last step is to eliminate the tackiness of Mod Podge.
  9. Screw the hinge back on.
  10. Admire your hard work!