Saturday, February 26, 2011

Inspiration: From Reese Witherspoon and Blood Oranges to a Pair of Spicy Earrings

Sitting down with a visually engrossing movie (good acting not necessary) is a great way to strike inspiration gold. Vanity Fair (2004) is one of these movies - the costumes are colourful and ornate, the scenery is varied, there are all types of vibrant birds flying around, and Reese Witherspoon's heroine Becky Sharp sports flowers, jewels and feathers (no doubt some of the aforementioned birds) in all of her hairstyles.

When I last watched it, the colours in Becky Sharp's orange and red sari really caught my eye:
From reesewitherspoonfans.com

Unfortunately, I couldn't get a great picture, but there's some light orange going on in there too. It reminded me of the colours in blood oranges:


So I made some earrings!

Inspiration: as simple as watching an overacted (but pretty) movie!

Tuesday, February 22, 2011

Buyer Beware: Purchasing Semiprecious Gemstone Jewelry and Supplies Online

The online marketplace is booming with sparkly offerings from talented artisans, big-box stores, and everything in between. Before buying jewelry or gemstones online, it's important to step back and evaluate your potential purchase.
  1. Descriptions. Is the item, including all materials, described thoroughly? As an Etsy seller, I always specify what type of metal I use and where, whether any stones are dyed, etc. Descriptions should not be vague (e.g. "yellow drop" is insufficient; look for jade drop, citrine drop, glass drop, plastic drop etc.)
  2. Photos. Are there multiple photos taken from different angles? Do the photos look like stock photos that have been reused (and therefore don't show the exact item you'll be purchasing)? 
  3. Research. Look up what you're buying. Many stones and metal components are not what they appear. Trade names for gemstones are often misleading as suppliers seek to make their stones more appealing. 
I've compiled a brief list of terms, including some common misnomers, and their definitions. It's by no means comprehensive, and I'll try to add to it in future blog posts.
  • Vermeil: Gold plated onto sterling silver. The gold used must be at least 10 karats to be considered vermeil. 
  •  Fruit Quartz. These "stones" include pineapple quartz and cherry quartz (pictured). The vast majority of fruit quartz on the market is glass with coloured inclusions. Naturally occurring cherry quartz is extremely rare. 
  • Howlite. Naturally occurring as a white stone with dark, vein-like inclusions (left). Porous and often dyed to imitate turquoise (right). If you're buying turquoise stones or jewelry for a very cheap price, you may be dealing with howlite, or a number of other dyed stones.
  
  • Tundru/Tundra/Tunduru Sapphire. May be a mix of gemstones, commonly pyrope garnet, hessonite garnet and tourmaline (clockwise from left). Tunduru, Tanzania produces a wide variety of gems including sapphire, and some Tunduru Sapphire strands are indeed genuine. However, many dealers are attempting to pass garnets for sapphires, calling them variations of Tunduru (e.g. Tundra).
  •  Water Sapphire. Trade name for Iolite.
    • Mystic Topaz and Mystic Quartz. Naturally occurring white topaz (left) and rock quartz (right) coated to add colour (often to give a rainbow effect).

    Sunday, February 20, 2011

    The Great Thumbprint Cookie Debate (otherwise known as "Oh no, my jam leaked!")

    I'm a relatively novice baker - I've had difficulties with cakes, but I make a mean cookie. Recently, I've also developed a weakness for peanut butter and jelly sandwiches. Therefore, when I saw a recipe for PB&J heart print cookies on the Martha Stewart website, I knew the baking gods were smiling. Since the recipe had no ratings at the time, I opted for a similar recipe on allrecipes.com.

    I wanted the same red heart effect (the cookies were for a Valentine's Day event) but an issue presented itself: should the jam go in before the cookies are baked or after? Similar recipes I have used in the past, as well as many commenters on allrecipes.com recommended that the jam be placed in the thumbprint before, as this enhanced the taste. However, both PB&J recipes called for the jam after baking.

    Since the cookies weren't for my private enjoyment, I wanted a) yummy, and b) presentable result. Therefore, I conducted a test! I rolled 4 cookies, made a thumbprint in 2 of them, a heart print (using my index finger) in 1 of them, and shaped the last one into a heart with a thumbprint. I filled all with jam but one of the balls.


    After baking, I found that:
    • the heart-shaped cookie lost its shape
    • the heart print cookie turned into a triangle print cookie
    • the cookies with jam developed unsightly light pink rings around the jam centres (due to cookie spread)
    • the cookie without jam lost the thumbprint almost entirely (due to cookie spread)
    • the pre-bake jam-filled cookies held a lot less jam than the post-bake jam-filled cookie 
    When I took the picture I was silly enough to not orient the tray the same way as the pre-bake photo.

    Clockwise from top: heart print cookie, heart shaped cookie, pre-bake jam-filled round, post-bake jam-filled round.

    Since the pre-bake jam-filled cookies looked a little silly, I opted for filling my batch with jam after baking. I made thumb prints and heart prints in the cookies before baking, but due to spread, I had press down the prints again after baking. Filling in the jam after baking also makes transportation easier - if you're willing to cart around a jar of jam!


    I couldn't manage to take a photo of the jam-filled cookies because they were all eaten! Overall, very tasty!

    Friday, February 18, 2011

    Spring 2011: Stripes and Brights

    Stripes, and the nautical motifs they conjure up, are ever present on spring runways. Who doesn't want to don the Breton stripes and feel a salty gust of wind or splash of ocean water?
    Also this year, the fashion world finally stepped away from neutrals and grabbed onto bright, saturated colour! Some designers blended the two worlds, contrasting the stark black and white of nautical stripes with splashes of colour.

    From left to right: Moschino Spring 2011 RTW, Moschino Spring 2011 RTW detail, House of Waris earrings, United Bamboo Spring 2011 RTW detail, Blugirl Spring 2011 RTW. From style.com and nymag.com.

    A simple way to incorporate this trend into your wardrobe is through bright accessories. Combine a cotton Breton stripe bateau top with red or green earrings, or weave a peacock blue scarf through your hair.

    Red coral, amazonite, green jade, turquoise, honey jade and lapis lazuli are all striking gemstones. Choose large opaque stones, faceted or polished, for earrings and necklaces.

    Wednesday, February 16, 2011

    Jewelry Design 101: Craft Wire

    This is the first in a series of jewelry design how-to posts. Upcoming posts will focus on jewelry models, including stacked and dangle earrings, lariats, custom findings, and more. 

    Inspiration has struck and you have a dashing idea in mind. It may be a colour scheme, a shape, or a detailed vision. Your storage boxes are well stocked with beads, findings, chain, and wire. You break out your pliers and some sterling silver headpins, wrap, twist, loop and snip, only to find that your vision looked better in the dreamy recesses of your mind.

    The #1 resource that will prevent you from chopping through expensive precious metal wire as you dismantle an unflattering design is coloured craft wire. It's cheap, easy to work with, and available at run-of-the-mill craft supply shops. Craft wire is made out of base metal (e.g. copper, brass) or base metal plated with precious metal. It comes in a range of gauges; the higher the gauge, the thinner the wire.


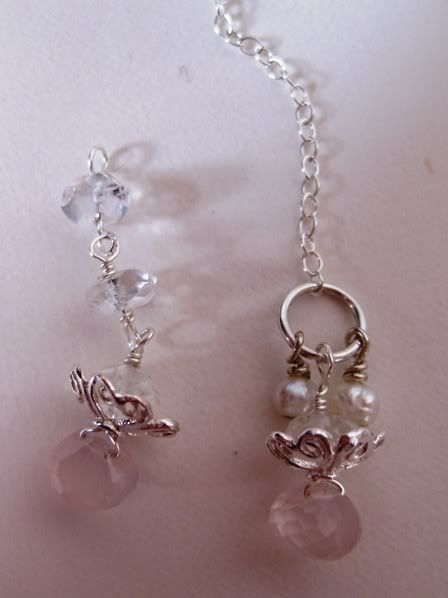
    Rather than creating a ready-to-wear jewelry piece, I suggest always creating a prototype using craft wire. If a design calls for head or ball pins, either purchase base metal headpins, or curl in the end of a piece of wire with your round-nose pliers.


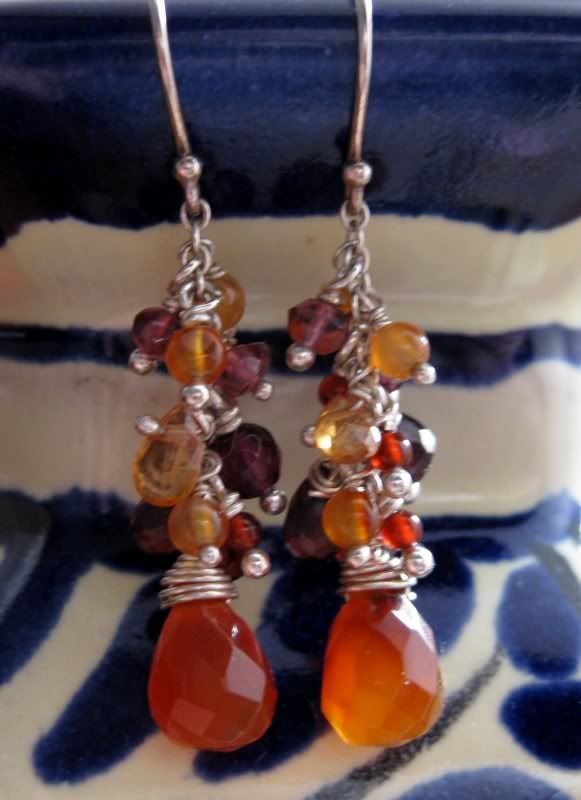
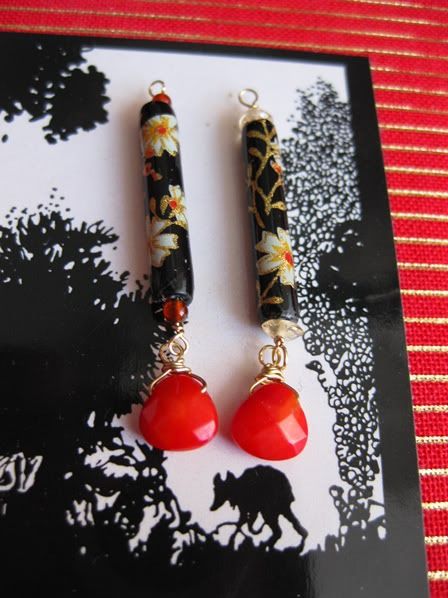
    Using craft wire, you can make variations of the same design with different beads, or use the same beads to make different designs. For instance, I used gold craft wire to make two simple stacked earrings: one with carnelian round accent beads, and one with citrine rondelle accent beads.


    Once your are satisfied with your prototype, remake it using your chosen precious metal wire. If using semiprecious stones, I don't suggest leaving the craft wire design hanging around too long as a dark circle will build up around the bead hole as the wire oxidizes.

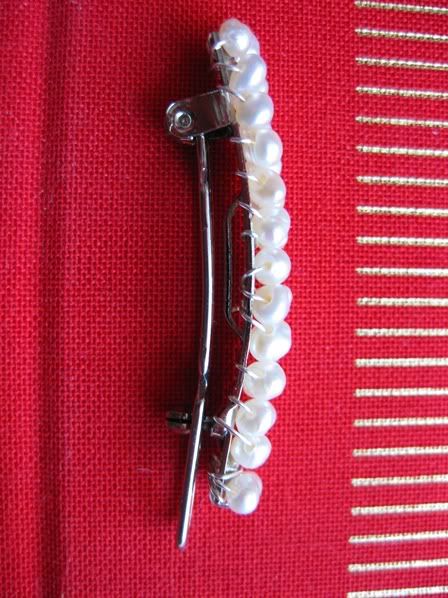
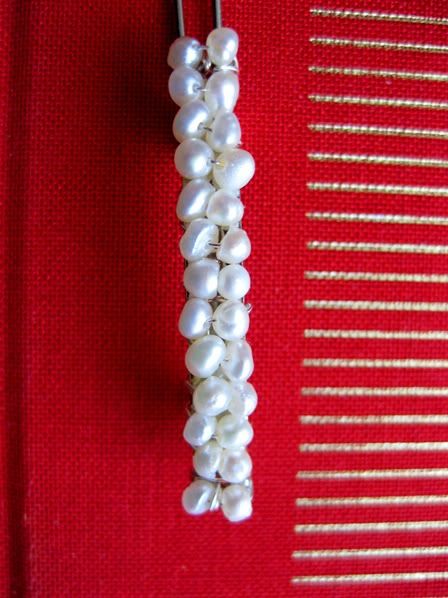
    Unless you have an unlimited stock of precious metal wire, it's also a good idea to use coloured craft wire in designs where the wire will not show or is not a feature of the design. Wire-wrapped barrettes are a good example: